ASPX Pages with Vue Routing
The router (or routing framework/plugin depending on the library selected) is an essential part of a Vue application (or any SPA for that matter). In Vue, the router "deeply integrates with [the] Vue.js core to make building Single Page Applications with Vue.js a breeze" (ref: https://router.vuejs.org/ - which is also the homepage/starting page for the router project).
This post starts with a basic routing demonstration and then moves into using some additional features (query parameters, programmatic navigation). One very practical approach is refactoring an existing ASP.NET WebForms project to condense multiple pages into one.
Basic Example
(gist with complete code: https://gist.github.com/mathewgrabau/c3c06fa0b25d3e0685fbfe3bba4a590f)
The most basic example is to get the routing up and running. Discarding panels/multi-views, these would most likely be two ASPX pages. Instead, each page is broken into a component definition:
const RouteOneComponent = {
template: `
<div>
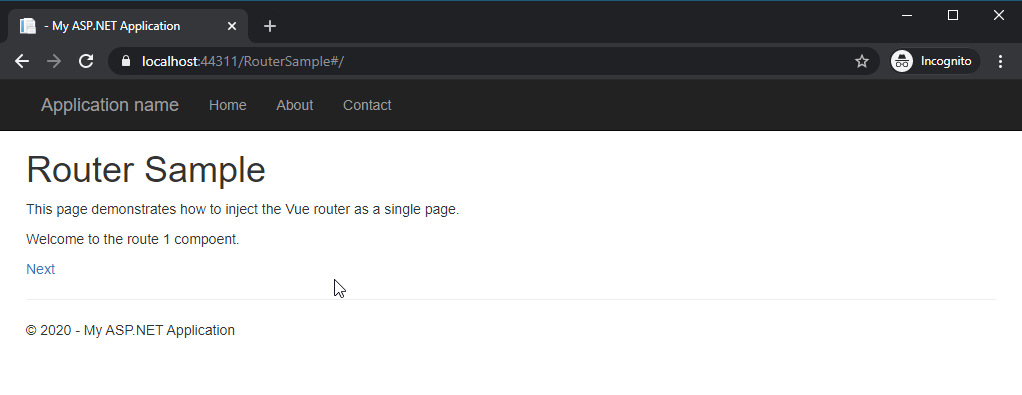
<p>Welcome to the route 1 compoent.</p>
<router-link :to="{name: 'route2'}">Next</router-link>
</div>
`
};
const RouteTwoComponent = {
template: `
<div>
<p>Welcome to the second component.</p>
<router-link :to="{name: 'route1'}">Back</router-link>
</div>
`
};
The template property defines the markup used to render the page. This is akin to the section in a single file Vue component. The template's contents are simple, each containing a message and a router-link to the next component. See the Vue Router documentation for more information on how that works.
Result/Demo
When the page loads, the sample appears as shown below:
Clicking on the link navigates to the second component (see the address bar):
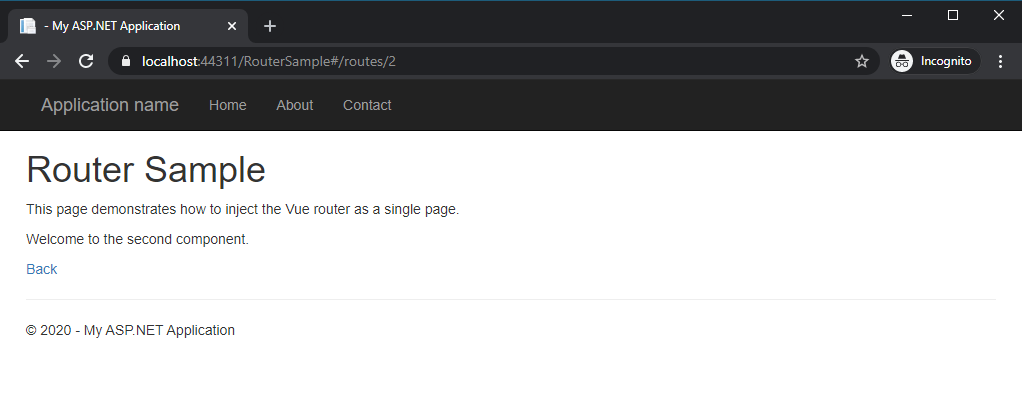
Clicking the Back link returns the link to the original page/component. Because we are using the Vue router (as evidenced with the hash sign in the URL in the address bar) there is no post-back. One caveat to that is the form submissions - prevent modifiers are required on the form's submit event to ensure that the event stops bubbling and does not cause the round-trip.
The next section of this article will demonstrate a router setup in a basic CRUD setup with mock data. It shows how to use the route parameters and programmatic navigation.
More Advanced Routing
As mentioned above, a more sophisticated example is now used for demonstrating routing involving parameters and other features. The basic application shows a CRUD setup that supports the single-page concept
To begin I generated a small collection of items to render/use in this application (just an excerpt from the top is shown, see the repository link for the complete definition):
<script type="text/javascript">
        window.onload = function () {

            // Create a simulated collection of items.
            const collectionData = [
                {
                    id: 1,
                    title: 'Item 1',
                    description: 'First item in the collection'
                },
                {
                    id: 2,
                    title: 'Item 2',
                    description: 'Second item in the collection'
                },
                {
                    id: 3,
                    title: 'Item 3',
                    description: 'Third item in the collection'
                }
            ];

            let lastRecordId = collectionData.length;   // NOTE: This is just for demonstration.
Router Definition
The routes are gathered in the following array:
const routes = [
	{
        path: '/',
        name: 'list',
        component: ListComponent
    },
	{
		path: '/create',
        name: 'create',
        component: CreateComponent
    },
    {
    	path: '/edit/:id',
        name: 'edit',
        component: EditComponent
    },
    {
        path: '/delete/:id',
        name: 'delete',
        component: DeleteComponent
    }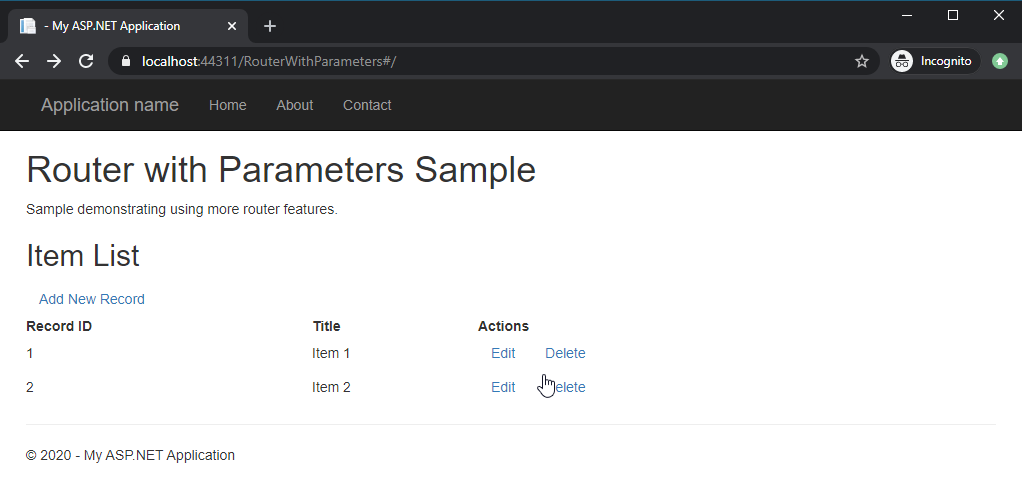
]List Items Component
The list items component is the most basic component. It renders a list of the data defined collectionData:
const ListComponent = {
                data() {
                    return {
                        items: collectionData
                    }
                },
                template: `
                    <div>
                        <h2>Item List</h2>

                        <router-link :to="{name: 'create'}" class="btn btn-link" role="button">Add New Record</router-link>

                        <table class="table">
                            <tr>
                                <th>Record ID</th>
                                <th>Title</th>
                                <th>Actions</th>
                            </tr>
                            <tr v-for="item in items">
                                <td>{{item.id}}</td>
                                <td>{{item.title}}</td>
                                <td><router-link :to="{name: 'edit', params: { id: item.id }}" class="btn btn-link">Edit</router-link> <router-link :to="{name: 'delete', params: { id: item.id }}" class="btn btn-link">Delete</router-link> </td>
                            </tr>
                        </table>

                    </div>
                `
};Once rendered the component looks like this:
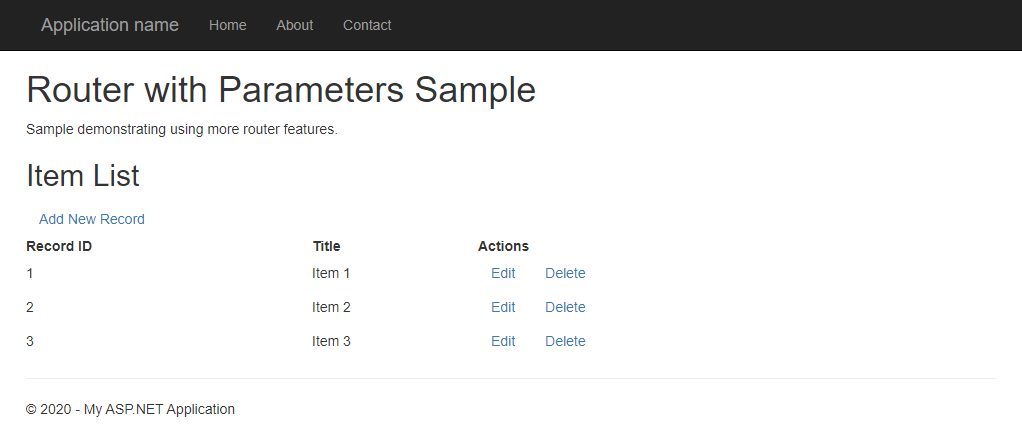
Clicking any of the links takes the user to the respective page without incurring a post-back.
Create Item Component
The create item component displays a simple form for entering the title and description of the next item to put in the collection. The definition code is as follows:
const CreateComponent = {
                data() {
                    return {
                        id: 0,
                        title: '',
                        description: ''
                    }
                },
                methods: {
                    createRecord() {
                        collectionData.push({ id: ++lastRecordId, title: this.title, description: this.description });
                        router.replace({ name: 'list' });   // Go back to the exisitng location.
                    }
                },
                template: `
                    <div>
                        <h2>Create New Record</h2>
                        <form @submit.prevent="createRecord">
                            <div class="form-group">
                                <label for="itemTitle">Item Title</label>
                                <input type="text" class="form-control" id="itemTitle" placeholder="Title" v-model="title">
                            </div>
                            <div class="form-group">
                                <label for="itemDescription">Item Description</label>
                                <input type="text" class="form-control" id="itemDescription" placeholder="Description" v-model="description">
                            </div>
                            <button type="submit" class="btn btn-default">Submit</button>
                        </form>
                    </div>
                `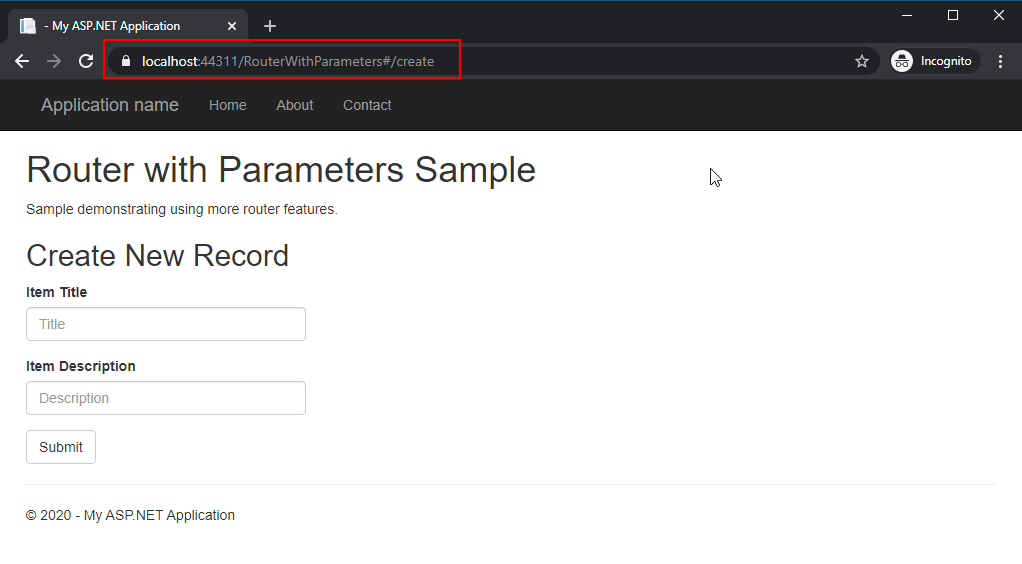
};The result of rendering the component is shown (either clicking the Add New Item link or visiting the route itself - RouterWithParameters.aspx#/create - highlighted in the red outline in the screenshot below):
Entering some data and clicking the Submit button adds the item to the collection and navigates back to the items list (new item highlighted by the red outline):

Editing Items
The editing action is triggered by clicking the Edit link displayed next to each item in the item list (table). Clicking on the link will navigate to the EditComponent, which uses the following component definition:
const EditComponent = {
                data() {
                    return {
                        record: {
                            id: Number(this.$route.params.id),
                            title: "",
                            description: ""
                        }
                    }
                },
                mounted() {
                    // Populate the collection here
                    for (let r in collectionData) {
                        if (this.record.id === collectionData[r].id) {
                            this.record.title = collectionData[r].title;
                            this.record.description = collectionData[r].description;
                        }
                    }
                },
                methods: {
                    updateRecord() {
                        for (let r in collectionData) {
                            if (this.record.id === collectionData[r].id) {
                                collectionData[r].title = this.record.title;
                                collectionData[r].description = this.record.description;
                                this.$router.go(-1);
                            }
                        }
                    },
                    goBack() {
                        this.$router.go(-1);
                    }
                },
                template: `
                    <div>
                        <h2>Edit Item {{record.id}}.</h2>
                        <form @submit.prevent="updateRecord">
                            <div class="form-group">
                                <label for="itemTitle">Item Title</label>
                                <input type="text" class="form-control" id="itemTitle" placeholder="Title" v-model="record.title">
                            </div>
                            <div class="form-group">
                                <label for="itemDescription">Item Description</label>
                                <input type="text" class="form-control" id="itemDescription" placeholder="Description" v-model="record.description">
                            </div>
                            <button type="submit" class="btn btn-primary">Submit</button>
                            <button class="btn" @click="goBack" type="button">Back</button>
                        </form>

                    </div>
                `
            };
Worth mentioning is how the EditComponent gets the ID value of the item to display. In this case, it is accessing the router to grab the id that was passed in the route: this.$route.params.id in the data definition. The same parameter is then used to load the record during the mounted life cycle event.
Because a copy of the object was made during loading, the updateRecord method finds the original object from the collectionData and updates it.
Programmatic navigation is demonstrated in the goBack method. It returns back to the previous page instead of assuming the user was on the ListComponent.
Gist: https://gist.github.com/mathewgrabau/e7e80d7463a322346f3bda7a9e5b08f8#file-edit-js
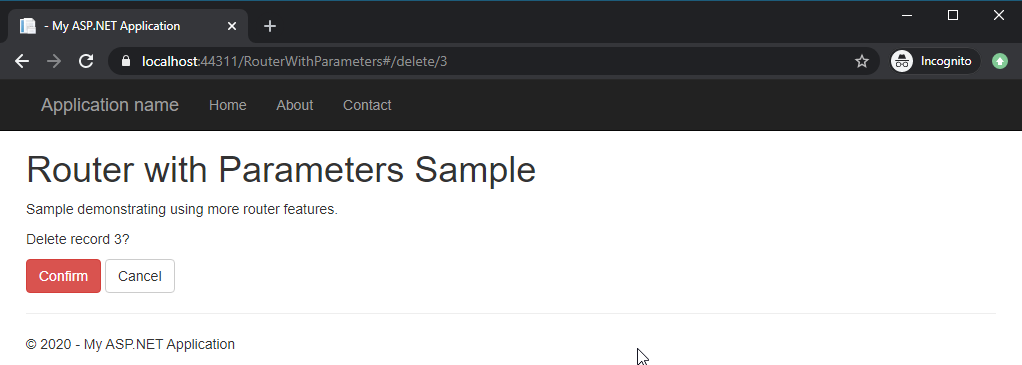
Delete Component
When clicking the Delete link in the list, a submit form is displayed to proper the user to confirm the operation before proceeding:
After clicking confirm, the user returns to the index/list, now without the third item:
The code for the DeleteComponent is:
const DeleteComponent = {
                data() {
                    return {
                        recordId: Number(this.$route.params.id)
                    }
                },

                methods: {
                    deleteRecord() {
                        let removeIndex = -1;
                        for (let recordIndex in collectionData) {
                            if (collectionData[recordIndex].id === this.recordId) {
                                removeIndex = recordIndex;
                                break;
                            }
                        }

                        // Execute the remove operation here.
                        if (removeIndex >= 0) {
                            collectionData.splice(removeIndex, 1);
                            this.$router.go(-1);
                        } else {
                            // TODO need an error somehow.
                        }
                    },
                    cancelDelete() {
                        this.$router.go(-1);
                    }
                },

                template: `
                    <div>
                        <form @submit.prevent="deleteRecord">
                            <p>Delete record {{recordId}}?</p>
                            <button class="btn btn-danger" type="submit">Confirm</button> <button class="btn btn-default" type="button" @click="cancelDelete">Cancel</button>
                        </form>
                    </div>
                `
            }
Gist: https://gist.github.com/mathewgrabau/e7e80d7463a322346f3bda7a9e5b08f8#file-delete-js
With the Delete operation in place, that covers all of the targeted CRUD operations.
Conclusions
The attempt to integrate the Vue Router has thus far proved to be possible and a good solution for making a hybrid router. As demonstrated, it is possible to leverage features such as route parameters and programmatic navigation.
The next feature that I intend to explore is using the axios package to interact with the ASPX back-end. The specific mechanisms and approach are still under consideration.